Use aria2+AriaNg as download service
Aria2 is a lightweight and powerful download utility. However, since aria2 is operated using command, it is slightly difficult for the normal user. Therefore, typically I use AriaNg as the web frontend to visualize the aria2.
Install and configure aria2
Install aria2.
sudo apt install aria2Create the configuration file. This article uses /root/.aria2 as the directory. The setting of aria2 is complicated, thus I usually use the configuration file created by P3TERX.
# change to root
sudo -i
# clone the repo
git clone https://github.com/P3TERX/aria2.conf.git
# rename to .aria2
mv aria2.conf /root/.aria2
Edit aria2.conf. In general, I only edit the following three parameters. For more description of parameters, see aria2's documentation. Note that if the directory of configuration files is not /root/.aria2, the corresponding address setting in aria2.conf need to be modified to your directory.
# download directory
dir=/root/Download
# rpc port
rpc-listen-port=12345
# rpc password
rpc-secret=PASSWORD
Next, update tracker information as follows. Trackers are crucial in BitTorrent downloads because they help ensure that all the pieces of the file are available among peers, making it easier for clients to download the file quickly and efficiently.
bash <(curl -fsSL git.io/tracker.sh) "/root/.aria2/aria2.conf"Create aria2.session to save session info, then run aria2c that uses the configuration file we created.
touch /root/.aria2/aria2.session
# use --conf-path to change the configuration file path
aria2c --conf-path=/root/.aria2/aria2.conf -D
Run ps -x | grep aria2. If the output is similar to the following, then aria2 is running successfully.
35979 ? Ss 0:00 aria2c --conf-path=/root/.aria2/aria2.conf -DAriaNg GUI
AriaNg is written in pure html & javascript, thus it does not need any compilers or runtime environment.
Download AriaNg from its repo to /var/www/AriaNg/ and unzip it.
mkdir -p /var/www/AriaNg && cd /var/www/AriaNg
wget https://github.com/mayswind/AriaNg/releases/download/1.3.2/AriaNg-1.3.2.zip
unzip AriaNg-1.3.2.zip && rm AriaNg-1.3.2.zip
Create a nginx configuration by touch /etc/nginx/conf.d/aria2.conf and add the following content. If you don't have SSL/TLS cert yet, see here and here.
server {
    listen          80;
    listen          443 ssl http2;
    server_name     aria2.domain.com;

    if ($server_port !~ 443){
        rewrite ^(/.*)$ https://$host$1 permanent;
    }

    ssl_certificate     dir/server.crt;
    ssl_certificate_key dir/server.key;

    ssl_session_timeout 1d;
    ssl_session_cache   shared:MozSSL:10m;
    ssl_session_tickets off;
    ssl_protocols       TLSv1 TLSv1.1 TLSv1.2 TLSv1.3;
    ssl_prefer_server_ciphers on;
    ssl_ciphers         HIGH:!aNULL:!MD5;

    location / {
        root /var/www/AriaNg;
        index index.html;
    }

    location ^~ /jsonrpc {
        proxy_set_header X-Real-IP $remote_addr;
        proxy_set_header X-Forwarded-For $proxy_add_x_forwarded_for;
        proxy_set_header Host $http_host;
        proxy_set_header X-NginX-Proxy true;
        proxy_set_header Connection "";
        proxy_pass_header X-Transmission-Session-Id;
        proxy_pass http://127.0.0.1:12345/jsonrpc;
    }
}
Change following parameters to your setting.
# domain name
server_name
# cert path
ssl_certificate
ssl_certificate_key
# change 12345 to your rpc-listen-port
proxy_pass http://127.0.0.1:12345/jsonrpc;
Restart nginx to reload the new configuration.
systemctl restart nginxNext, open the browser and access the domain set in the nginx configuration. Click on AriaNg Settings at ① and RPC (aria2.domain.com) at ②, then change the port to 443 at ③ and fill rpc-secret into Aria2 RPC Secret Token at ④.
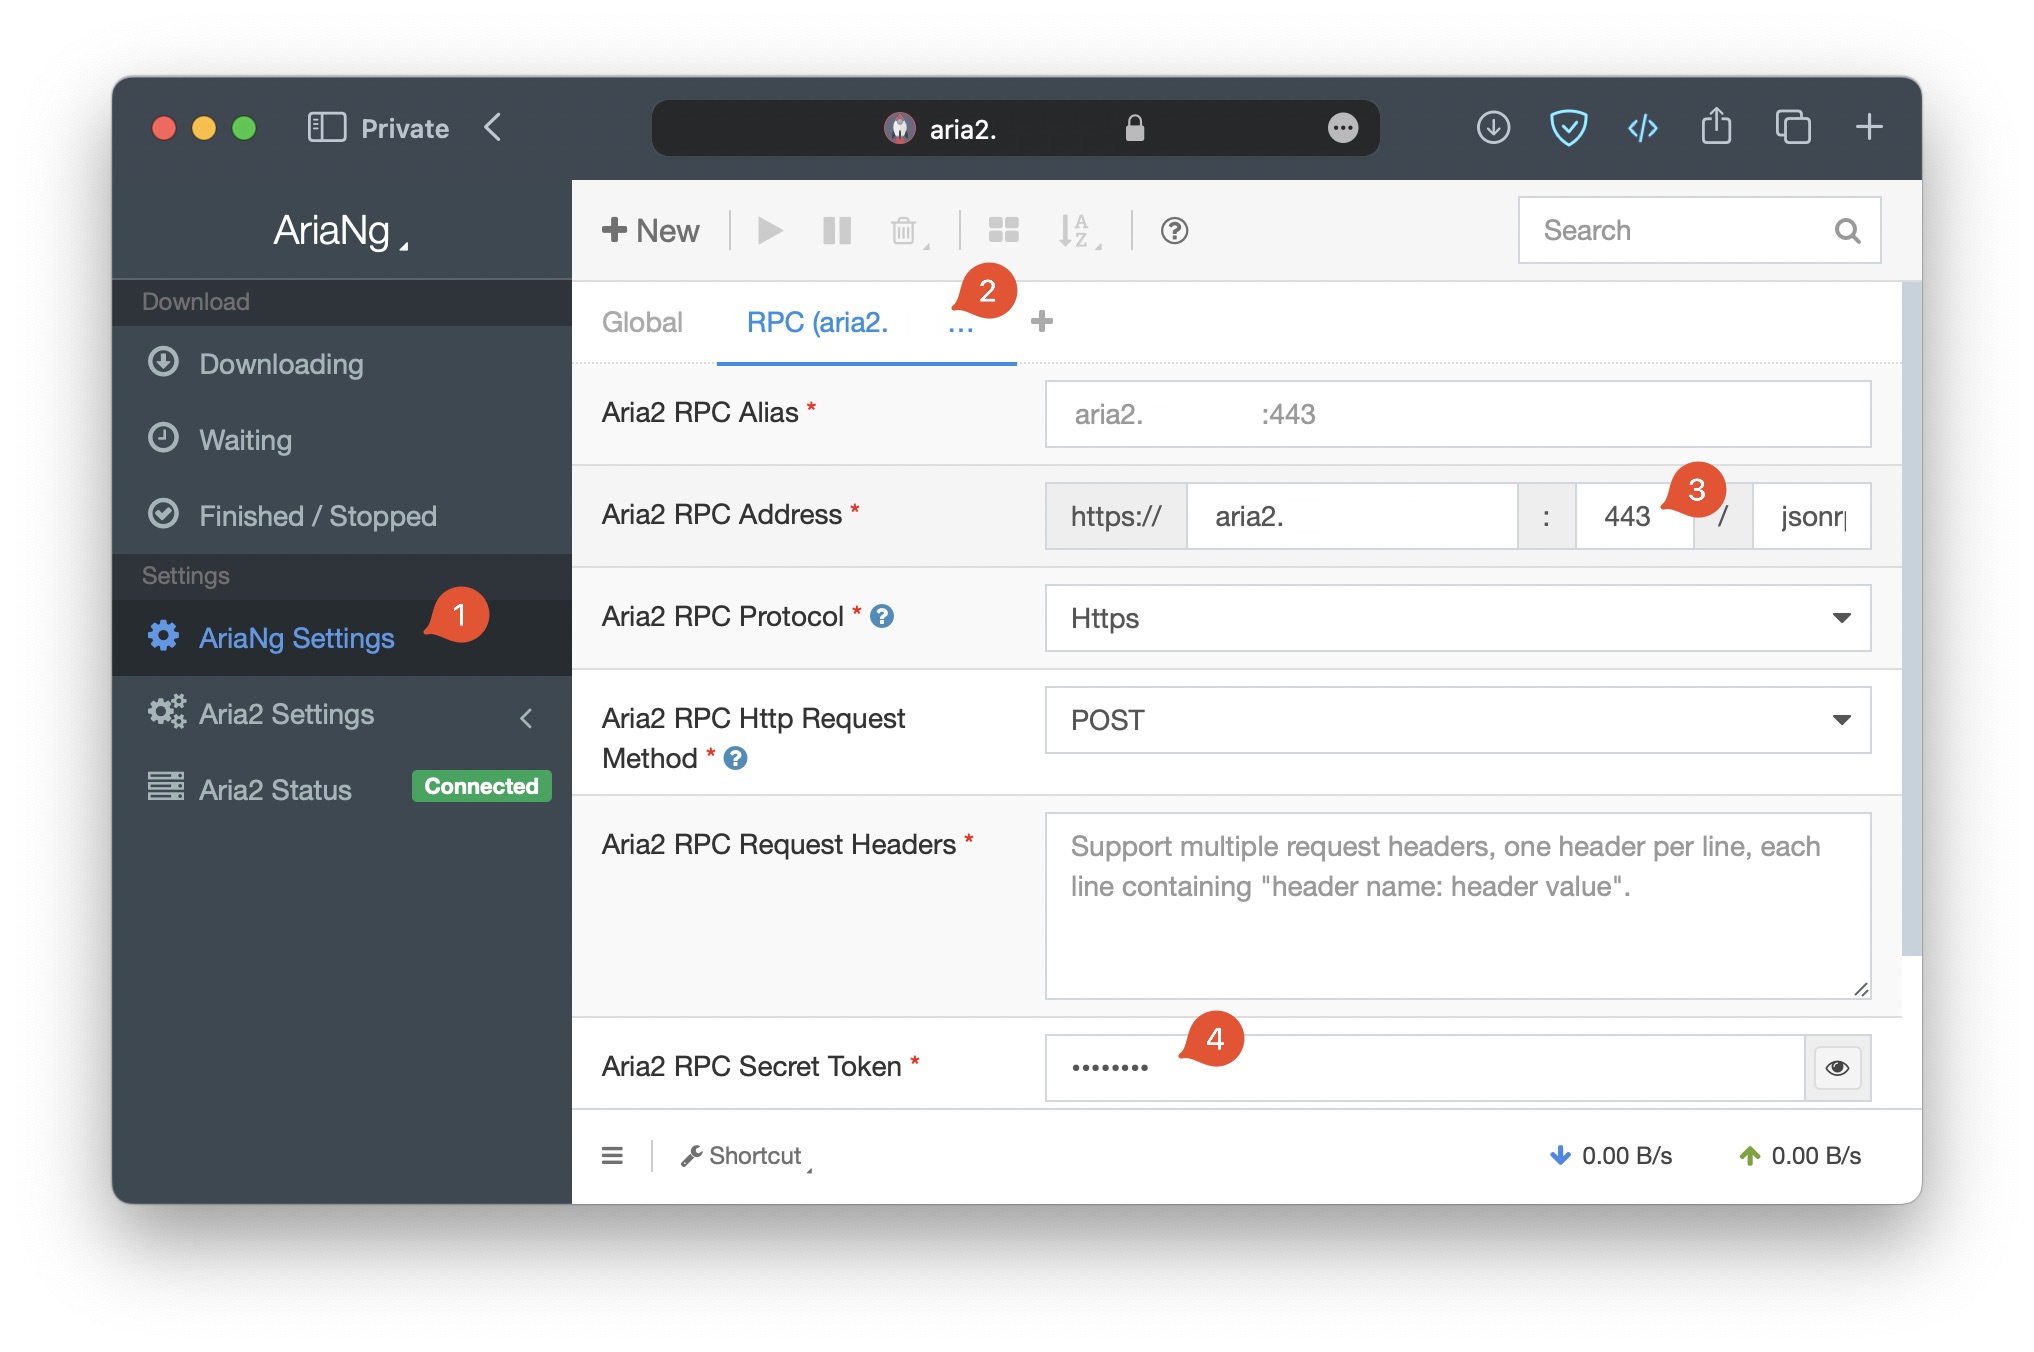
Refresh the web, the Aria2 Status should become Connected.
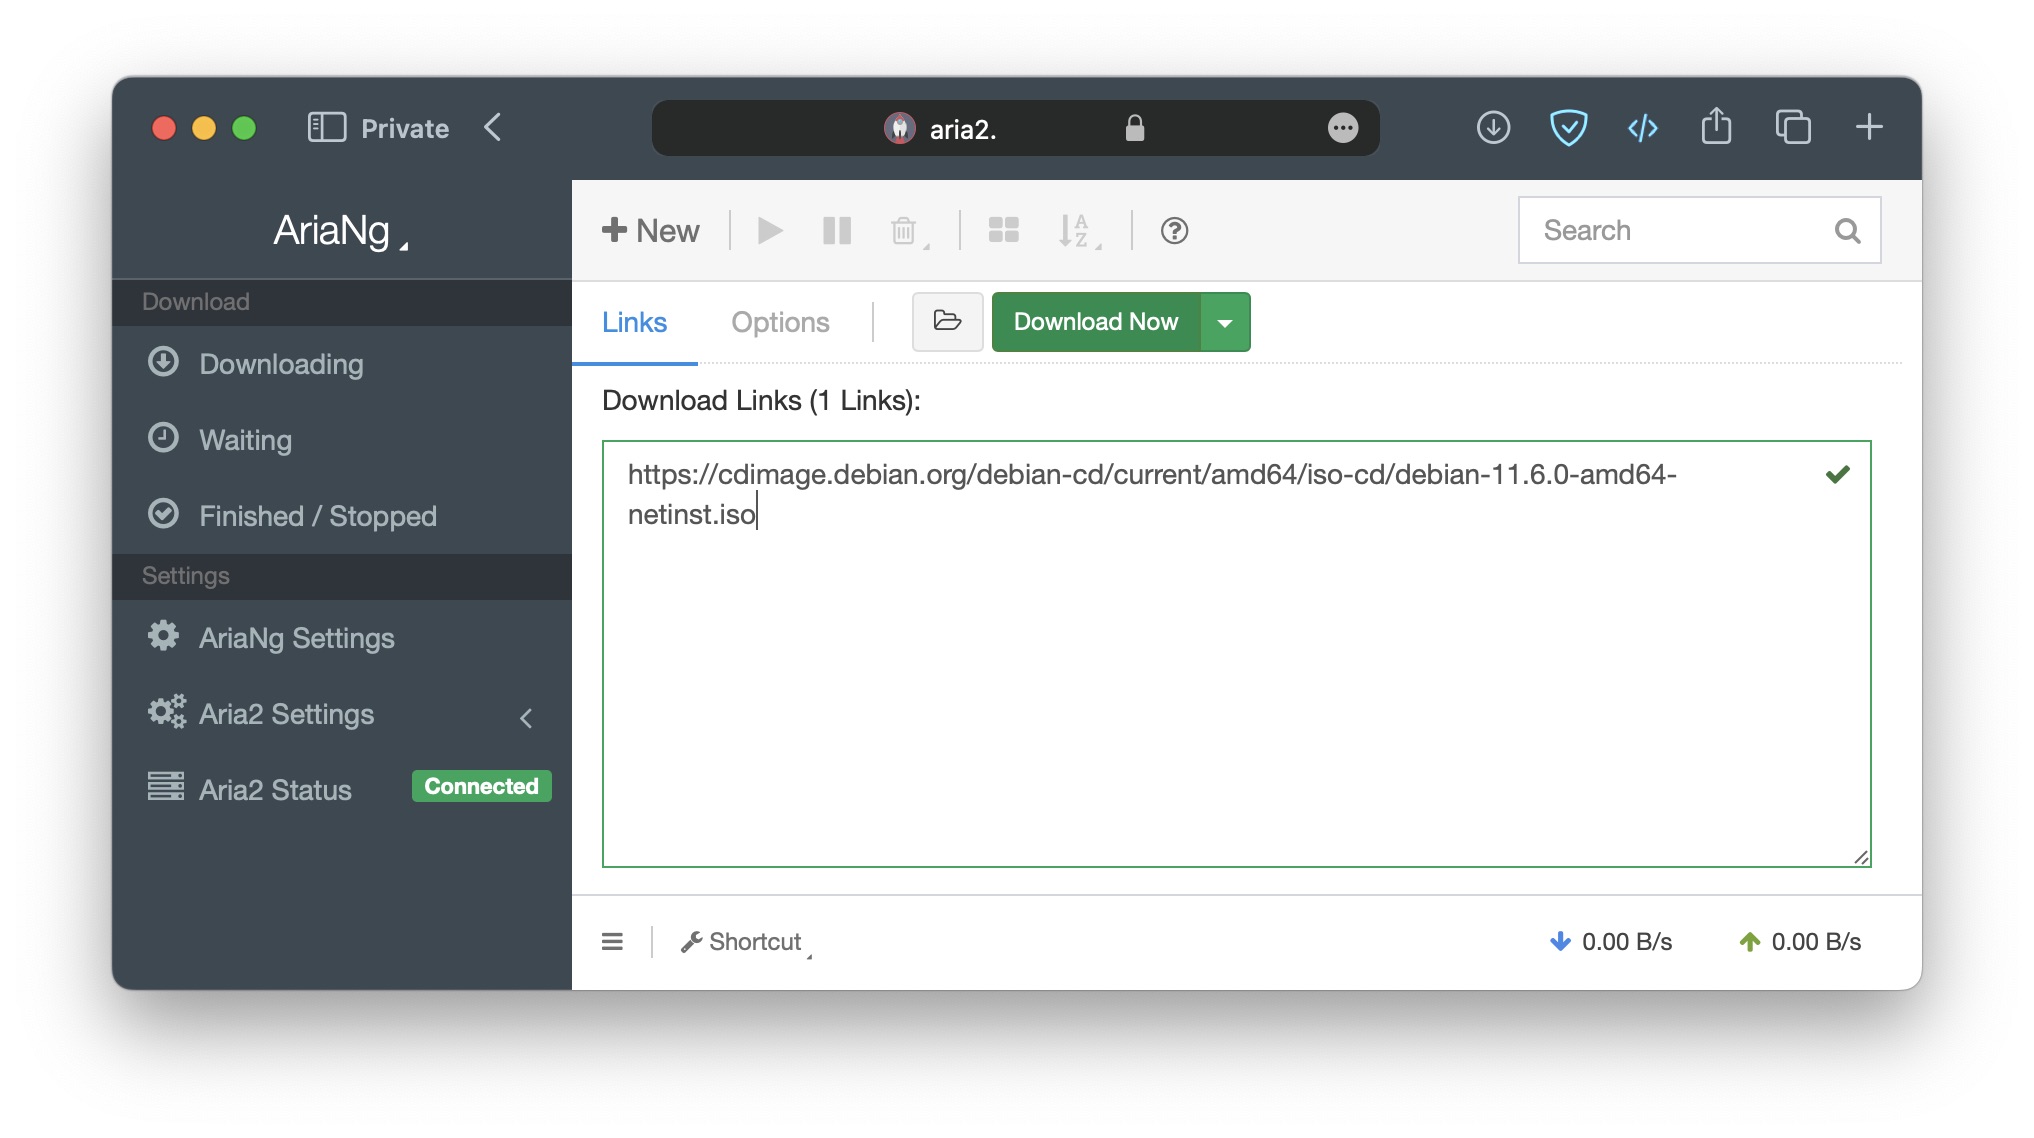
Try to download a file.
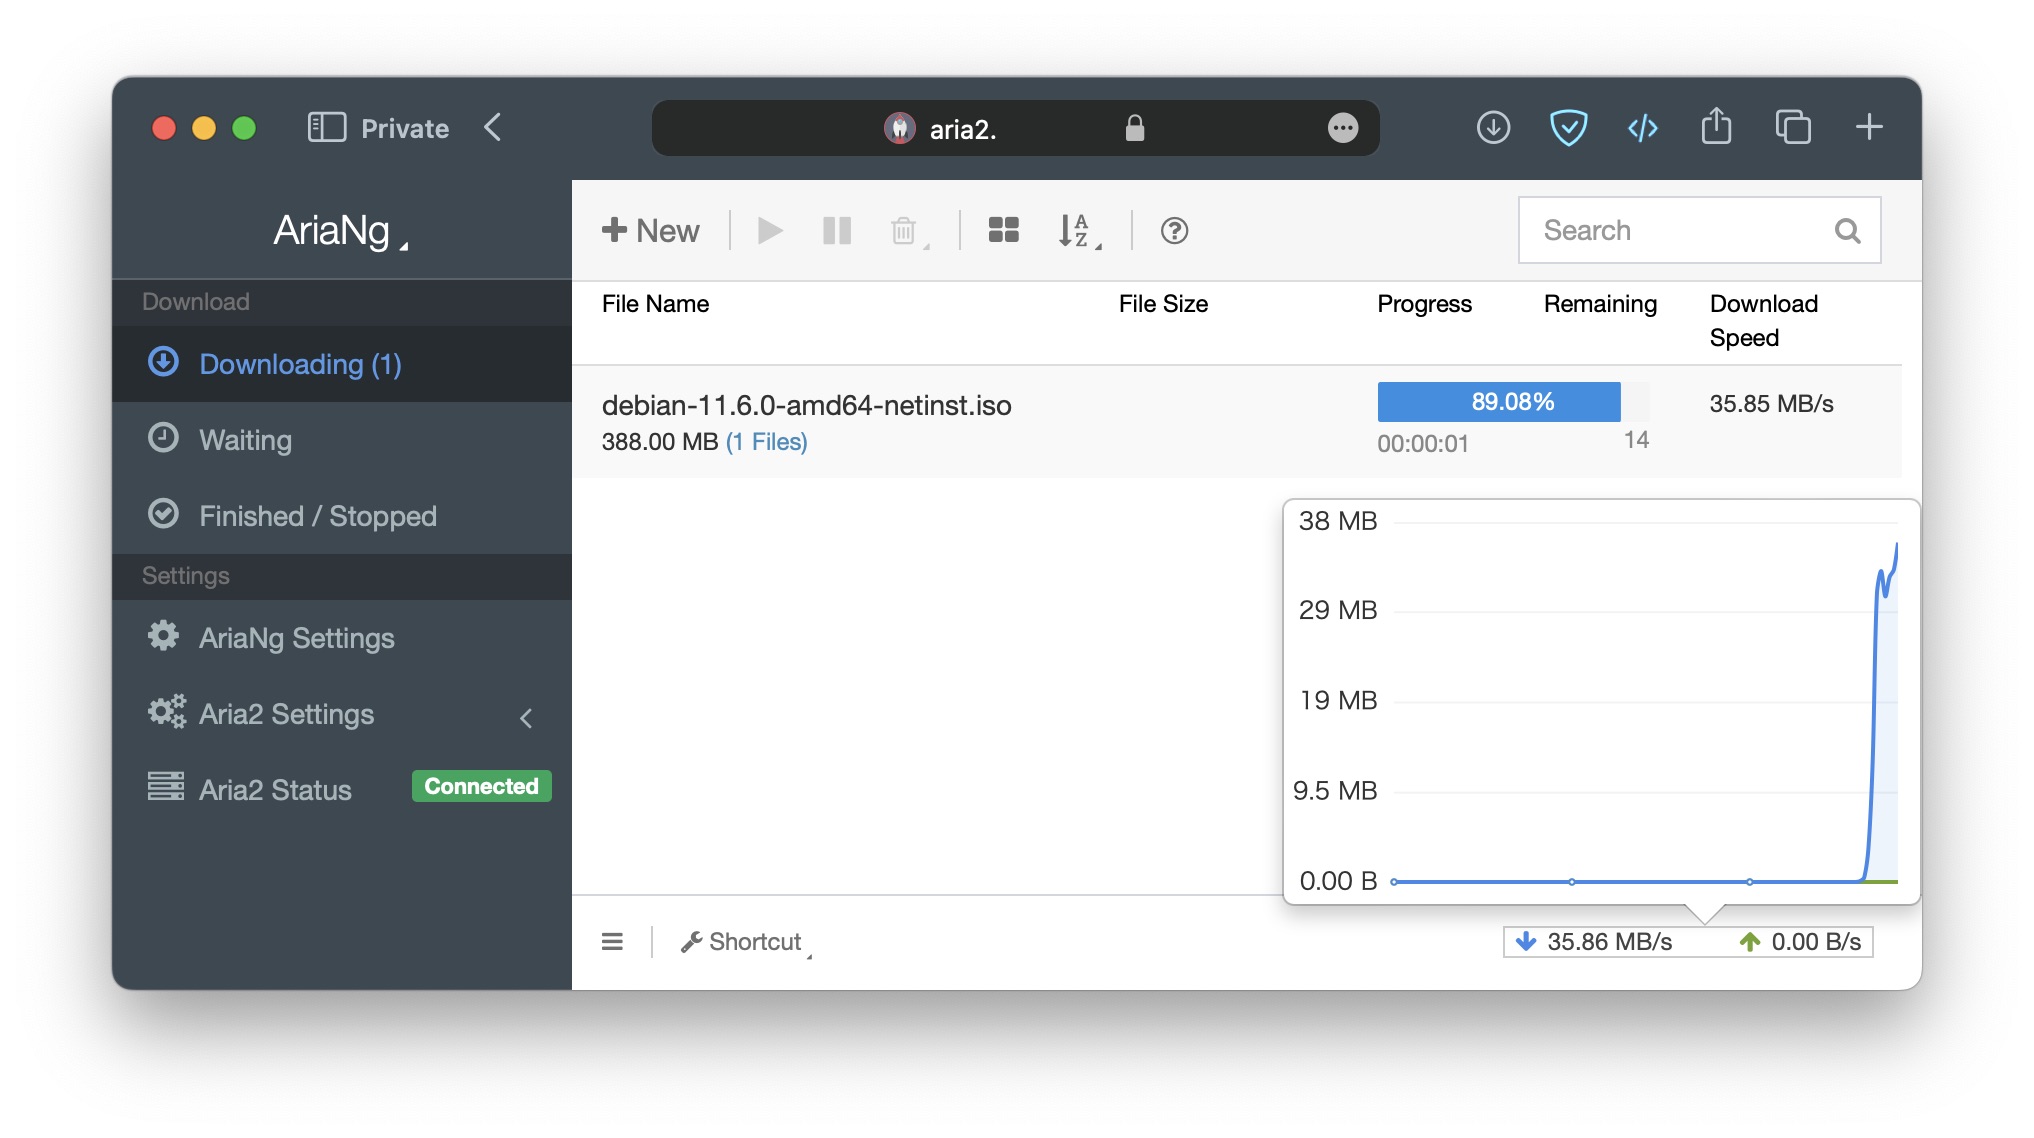
Seems to work perfectly🍷