Install CUDA and TensorRT on WSL2 Debian
Recently I got a GPU and started setting up for deep learning. Most guides I found focus on Ubuntu, and for a while I almost thought Debian wouldn't work. Fortunately, I successfully installed CUDA and TensorRT on my WSL2 Debian. Debian is better!
In this article, I managed to set up the environment to run YOLOv5 running via ONNXRuntime (ORT) using CUDA and TensorRT. Here's a quick overview of the setup:
Host OS: Windows 11WSL2 OS: Debian 12GPU: RTX 5060 TiCUDA Version: 12.9ORT version: 1.22
1. Install CUDA
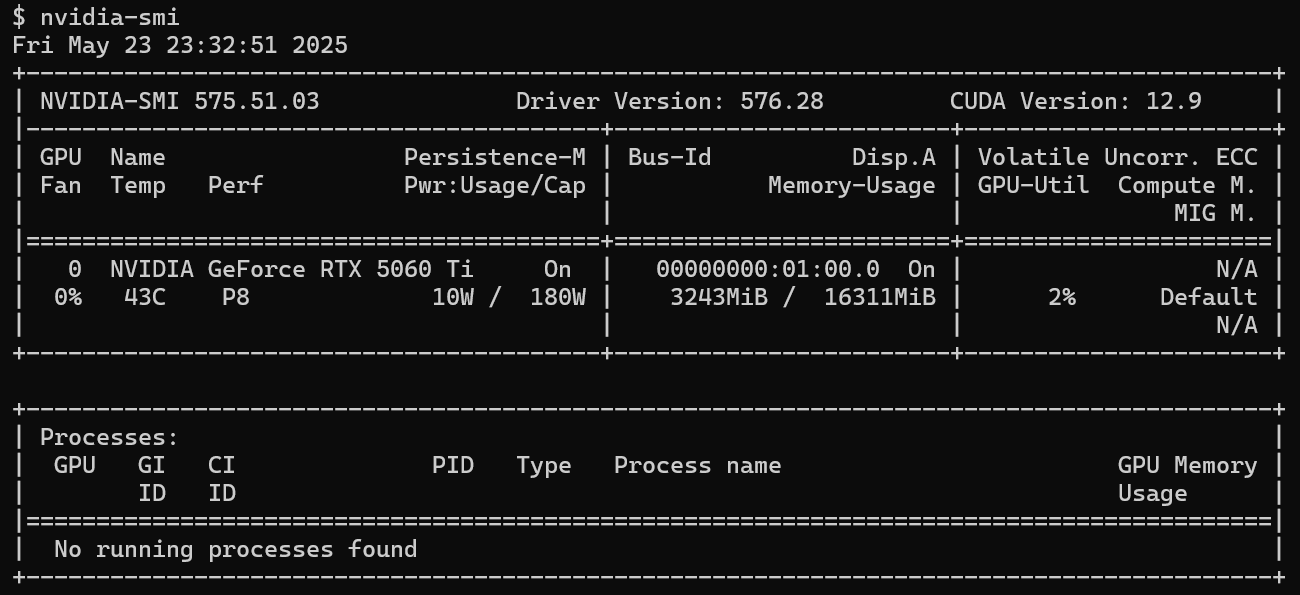
It's recommended to install the GPU driver on the Windows host (via this page). Once installed, running nvidia-smi inside WSL to confirm.
2. Install Dependencies via Conda
ORT 1.22's CUDA provider depends on several shared libraries. Run ldd libonnxruntime_providers_cuda.so to check them:
| Dependency | Version |
|---|---|
| cublas | 12 |
| cudnn | 9 |
| curand | 10 |
| cufft | 11 |
| cudart | 12 |
Then install them.
# create venv
conda create -n cudaenv python=3.10
conda activate cudaenv

# install dependencies
conda install libcublas=12 cudnn=9 libcurand=10 libcufft=11 cuda-cudart=12
See conda-forge packages for more info or to search different versions.
All libraries end up in /home/[Username]/miniforge3/envs/cudaenv/lib. Add this folder to LD_LIBRARY_PATH as follows.
export LD_LIBRARY_PATH=$LD_LIBRARY_PATH:/home/[Username]/miniforge3/envs/cudaenv/libAt this point, ORT should be able to run inference using CUDA.
3. Install TensorRT
We need additional libraries to enable the TensorRT provider. The output of ldd libonnxruntime_providers_tensorrt.so indicated that libnvinfer.so.10 was missing.
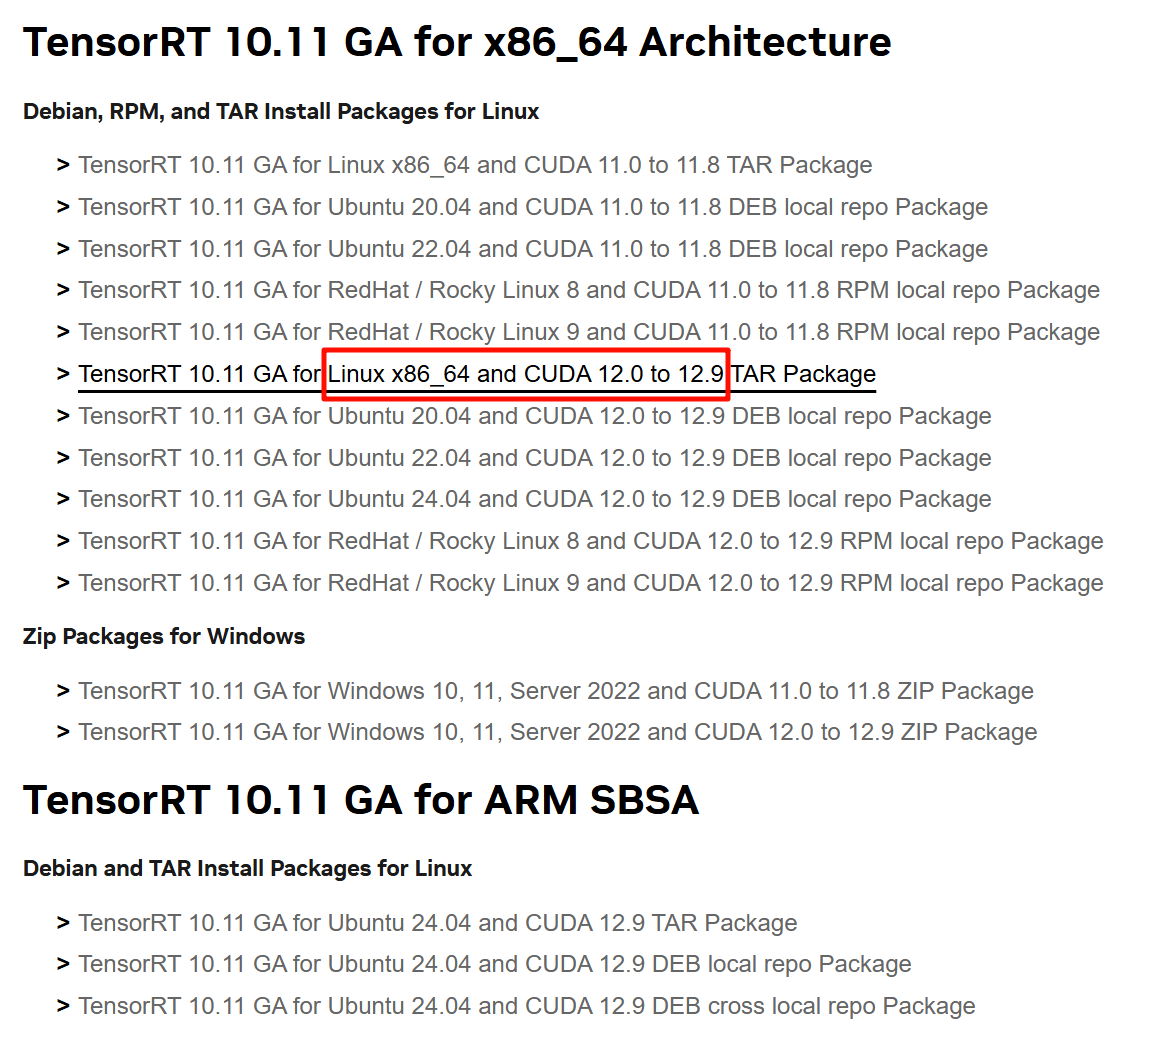
I installed TensorRT following this guide. TensorRT can be downloaded from here. In my case, I needed to download TensorRT 10. Make sure the version is compatible with the CUDA version.
After downloading and extracting the archive, add its library path to LD_LIBRARY_PATH.
export LD_LIBRARY_PATH=$LD_LIBRARY_PATH:/home/[Username]/workspace/libs/TensorRT-10.7.0.23/targets/x86_64-linux-gnu/lib4. Simple Benchmark
The benchmarking code is adapted from this repository, an ORT implementation of YOLOv5. Use following code to choose the inference backend:
// select CPU or GPU by setting `provider`
std::vector<std::string> available_providers = Ort::GetAvailableProviders();
auto cuda_available = std::find(available_providers.begin(), available_providers.end(), "CUDAExecutionProvider");
auto trt_available = std::find(available_providers.begin(), available_providers.end(), "TensorrtExecutionProvider");
OrtCUDAProviderOptions cuda_options{};
OrtTensorRTProviderOptions trt_options{};
if (provider != 0 && (cuda_available == available_providers.end()))
{
    std::cout << "Inference device: CPU\n";
}
else if (provider == 1 && (cuda_available != available_providers.end()))
{
    std::cout << "Inference device: GPU CUDA\n";
    session_options.AppendExecutionProvider_CUDA(cuda_options);
}
else if (provider == 2 && (trt_available != available_providers.end()))
{
    std::cout << "Inference device: GPU TRT\n";
    session_options.AppendExecutionProvider_TensorRT(trt_options);
}
else
{
    session_options.SetIntraOpNumThreads(threads);
    std::cout << "Inference device: CPU\n";
}
The test measures inference time by running YOLOv5 on a 1216x1216 image 15 times.
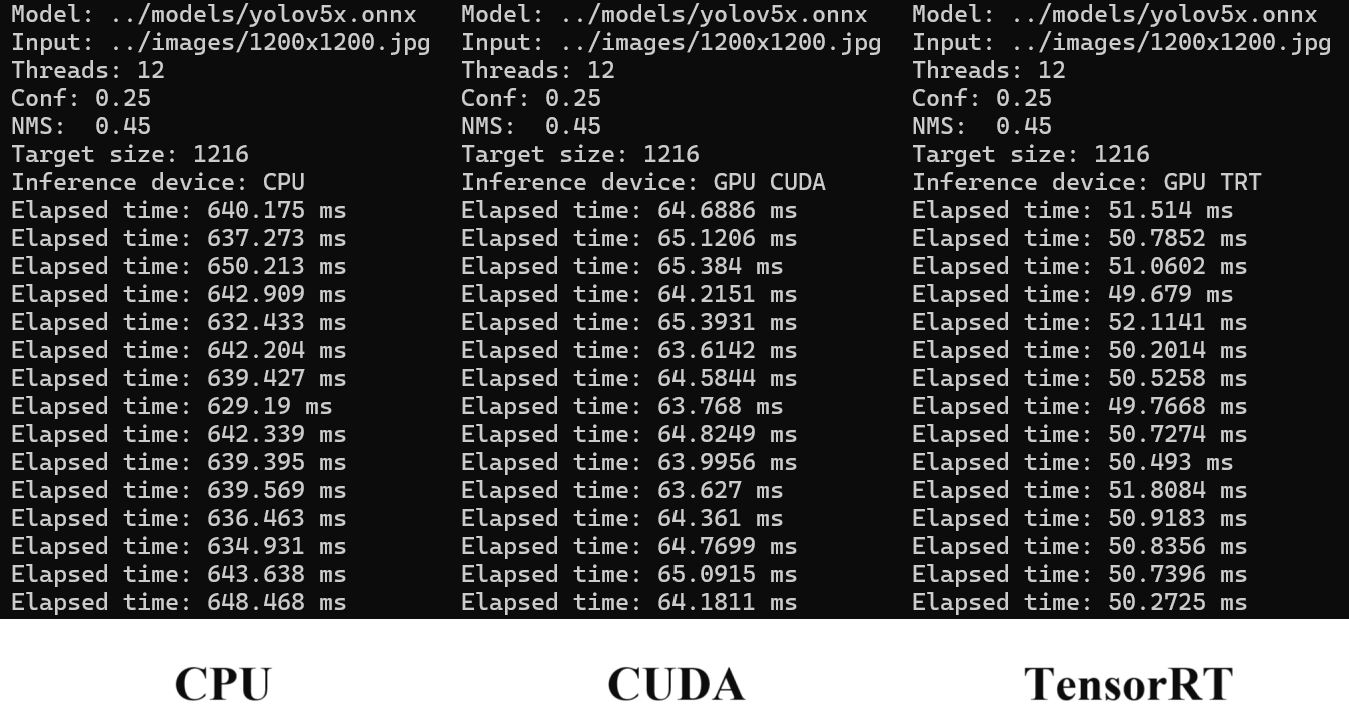
TensorRT is the fastest as expected.
Detection Results

Tips
If you find the full TensorRT download too large, an alternative is to install it via pip (about 4 GB):
pip install --upgrade tensorrt