Enable TLS communication between frps and frpc
In this article I introduced how to use frp to establish an SSH connection to a local server. In fact, services running on a local server also can be exposed to the internet via frp's TCP forwarding. For instance, I ran a chat service on my old laptop without public IP address and made it accessible over the internet. However, a potential security issue is that the traffic between the local client and server is plaintext if you just use the tcp or http mode. This article records how to enable TLS feature.
Since the basic setup of frp was introduced previously, it does not receive description there. Check out this article if you haven't deployed frp on your hosts.
First of all, frp supports both HTTP and HTTPS transmission modes, and offers different services based on the domain name. However, I didn't get HTTPS to work properly (now I realized that maybe it is due to certificate issues). Thus I choose another way from the official document: encrypting with TLS. This is also the official recommended security configuration.
The content of this article is based on the official document. However, the document has some ambiguity and repeating parts, that spent me, a noob, a lot of time to figure out. I will explain them clearly and provide some examples.
Generate frps cert on client
Prepare openssl config file.
# show configuration directory
$ openssl version -d
OPENSSLDIR: "/usr/lib/ssl"

# copy to your directory
cp /usr/lib/ssl/openssl.cnf ./my-openssl.cnf
Build certs for server on client. Change IPADDRESS to server's IP address.
# generate ca certs
openssl genrsa -out ca.key 2048
openssl req -x509 -new -nodes -key ca.key -subj "/CN=example.ca.com" -days 5000 -out ca.crt

# generate certs for server
openssl genrsa -out server.key 2048

openssl req -new -sha256 -key server.key \
    -subj "/C=XX/ST=DEFAULT/L=DEFAULT/O=DEFAULT/CN=server.com" \
    -reqexts SAN \
    -config <(cat my-openssl.cnf <(printf "\n[SAN]\nsubjectAltName=DNS:localhost,IP:IPADDRESS,DNS:example.server.com")) \
    -out server.csr

openssl x509 -req -days 3650 -sha256 \
    -in server.csr -CA ca.crt -CAkey ca.key -CAcreateserial \
    -extfile <(printf "subjectAltName=DNS:localhost,IP:IPADDRESS,DNS:example.server.com") \
    -out server.crt
The following figure shows an example.
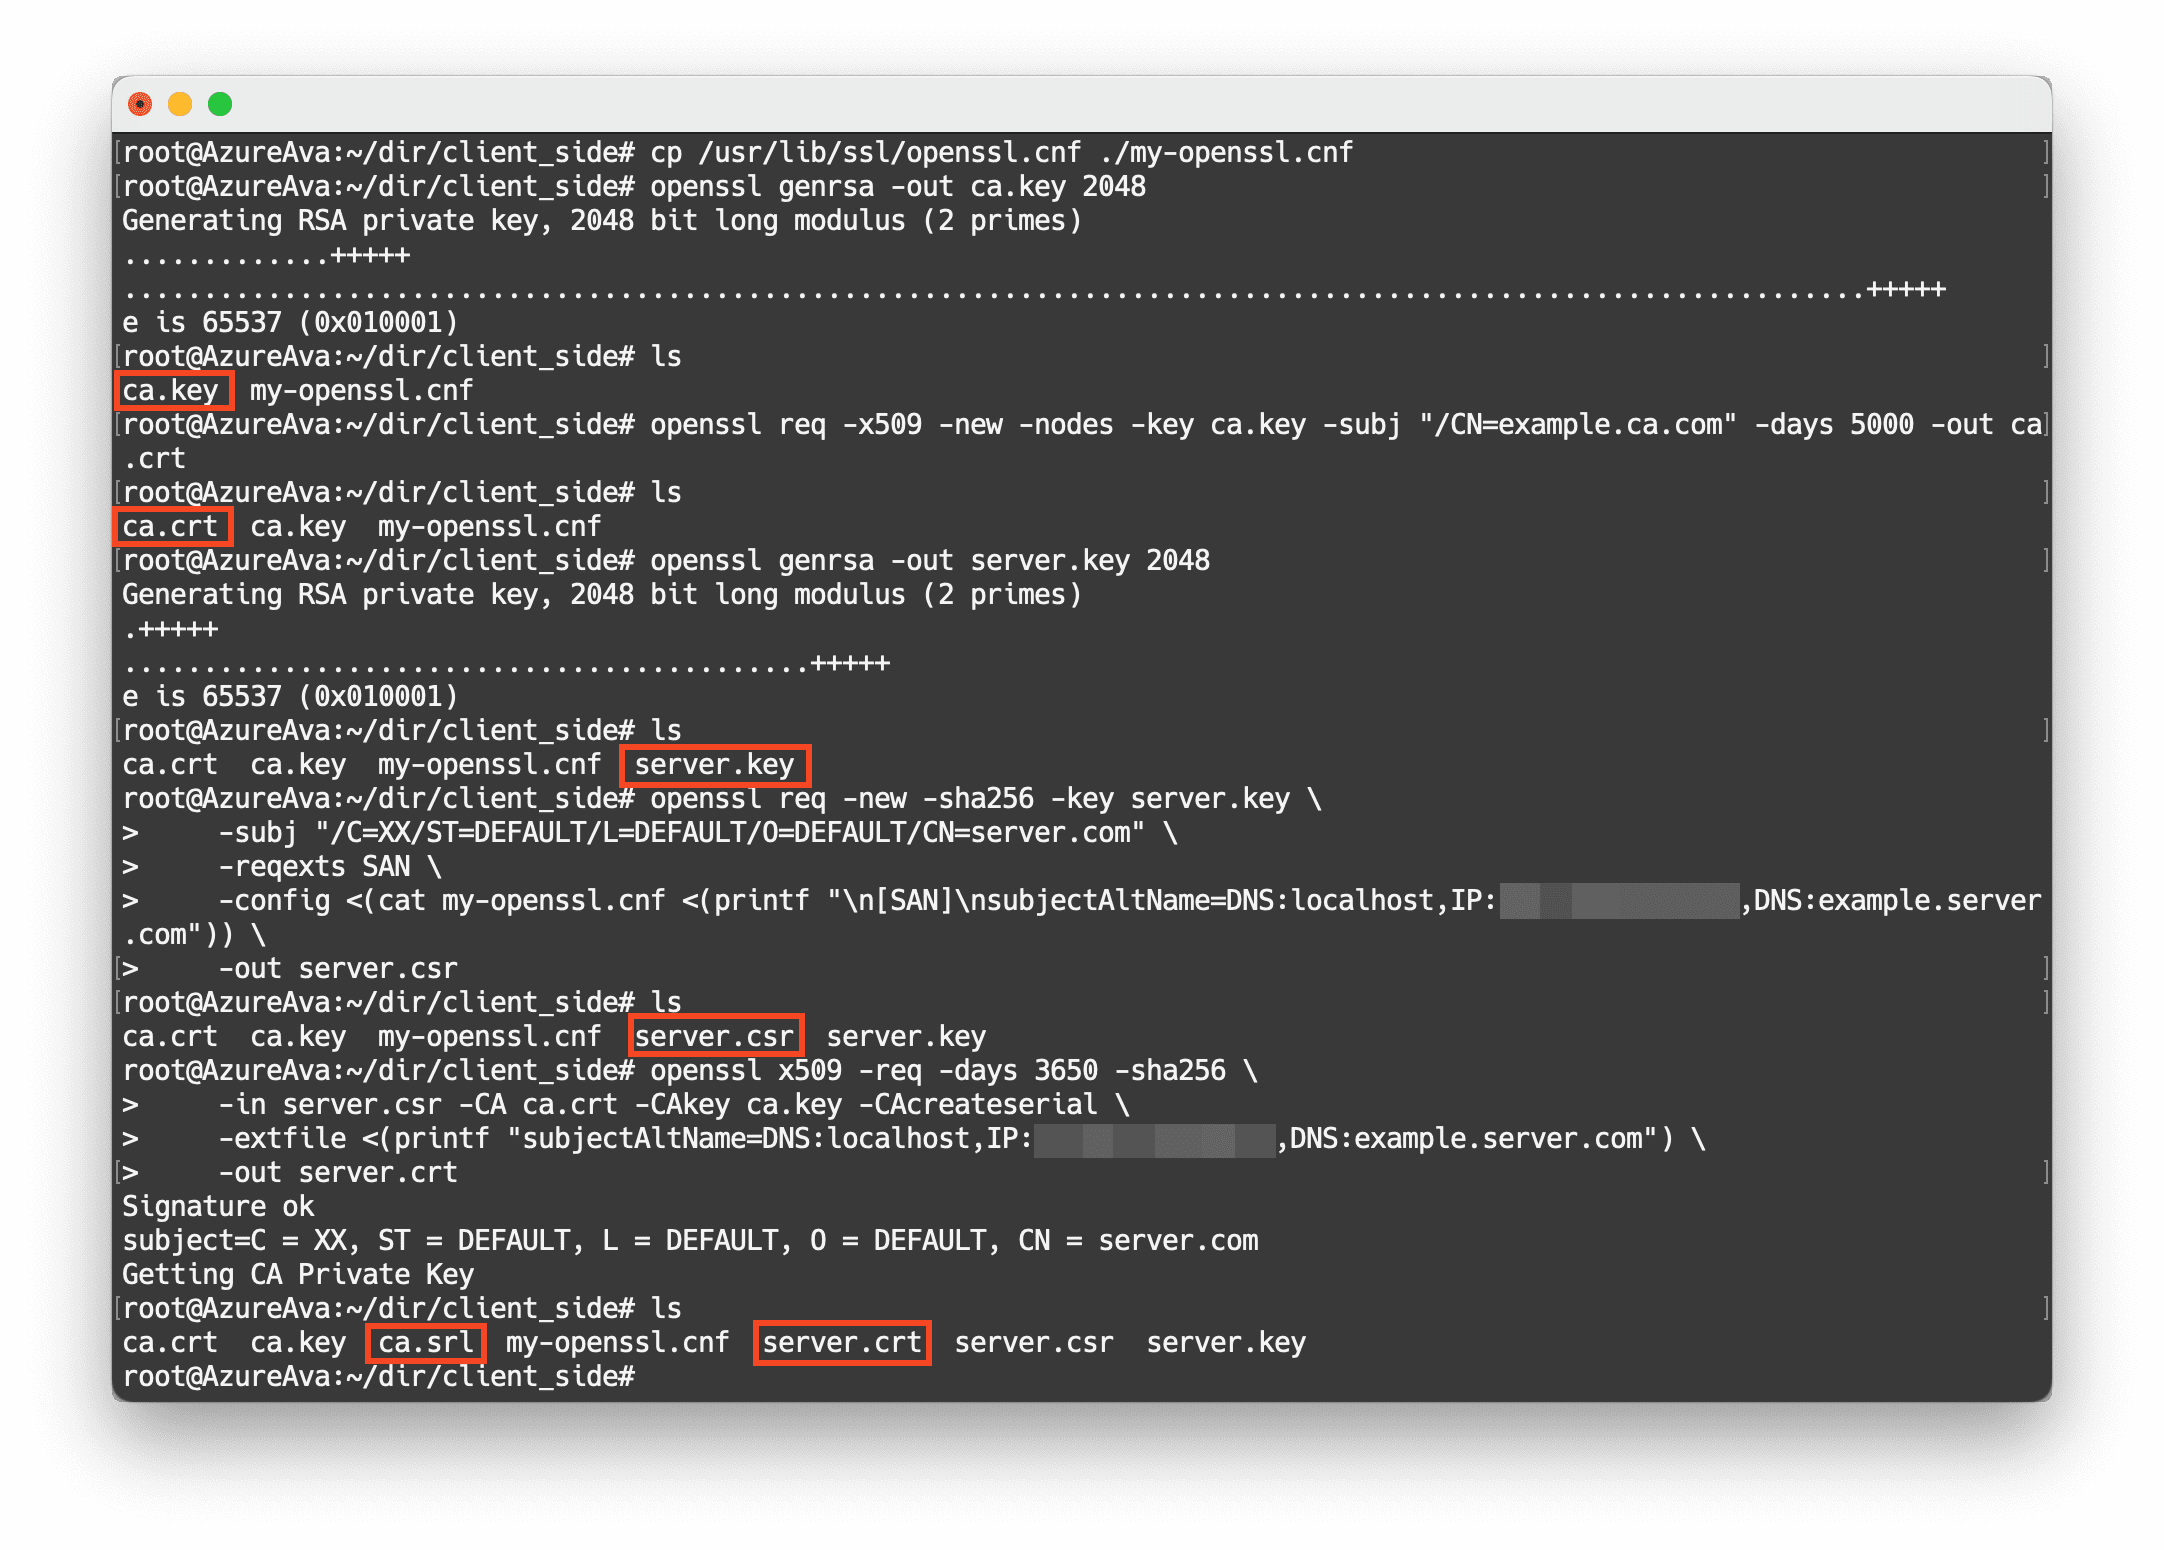
Then, copy server.key and server.crt to the server using scp or something else.
Generate frpc cert on server
Similarly, generate ca certs according to the configuration file, then build certs for client on server. The IP address is not required in client cert, thus following codes can be run immediately without edit.
# show configuration directory
$ openssl version -d
OPENSSLDIR: "/usr/lib/ssl"

# copy to your directory
cp /usr/lib/ssl/openssl.cnf ./my-openssl.cnf

# generate ca serts
openssl genrsa -out ca.key 2048
openssl req -x509 -new -nodes -key ca.key -subj "/CN=example.ca.com" -days 5000 -out ca.crt

# generate certs for server
openssl genrsa -out client.key 2048

openssl req -new -sha256 -key client.key \
    -subj "/C=XX/ST=DEFAULT/L=DEFAULT/O=DEFAULT/CN=client.com" \
    -reqexts SAN \
    -config <(cat my-openssl.cnf <(printf "\n[SAN]\nsubjectAltName=DNS:client.com,DNS:example.client.com")) \
    -out client.csr

openssl x509 -req -days 3650 -sha256 \
    -in client.csr -CA ca.crt -CAkey ca.key -CAcreateserial \
    -extfile <(printf "subjectAltName=DNS:client.com,DNS:example.client.com") \
    -out client.crt
The following figure shows an example.
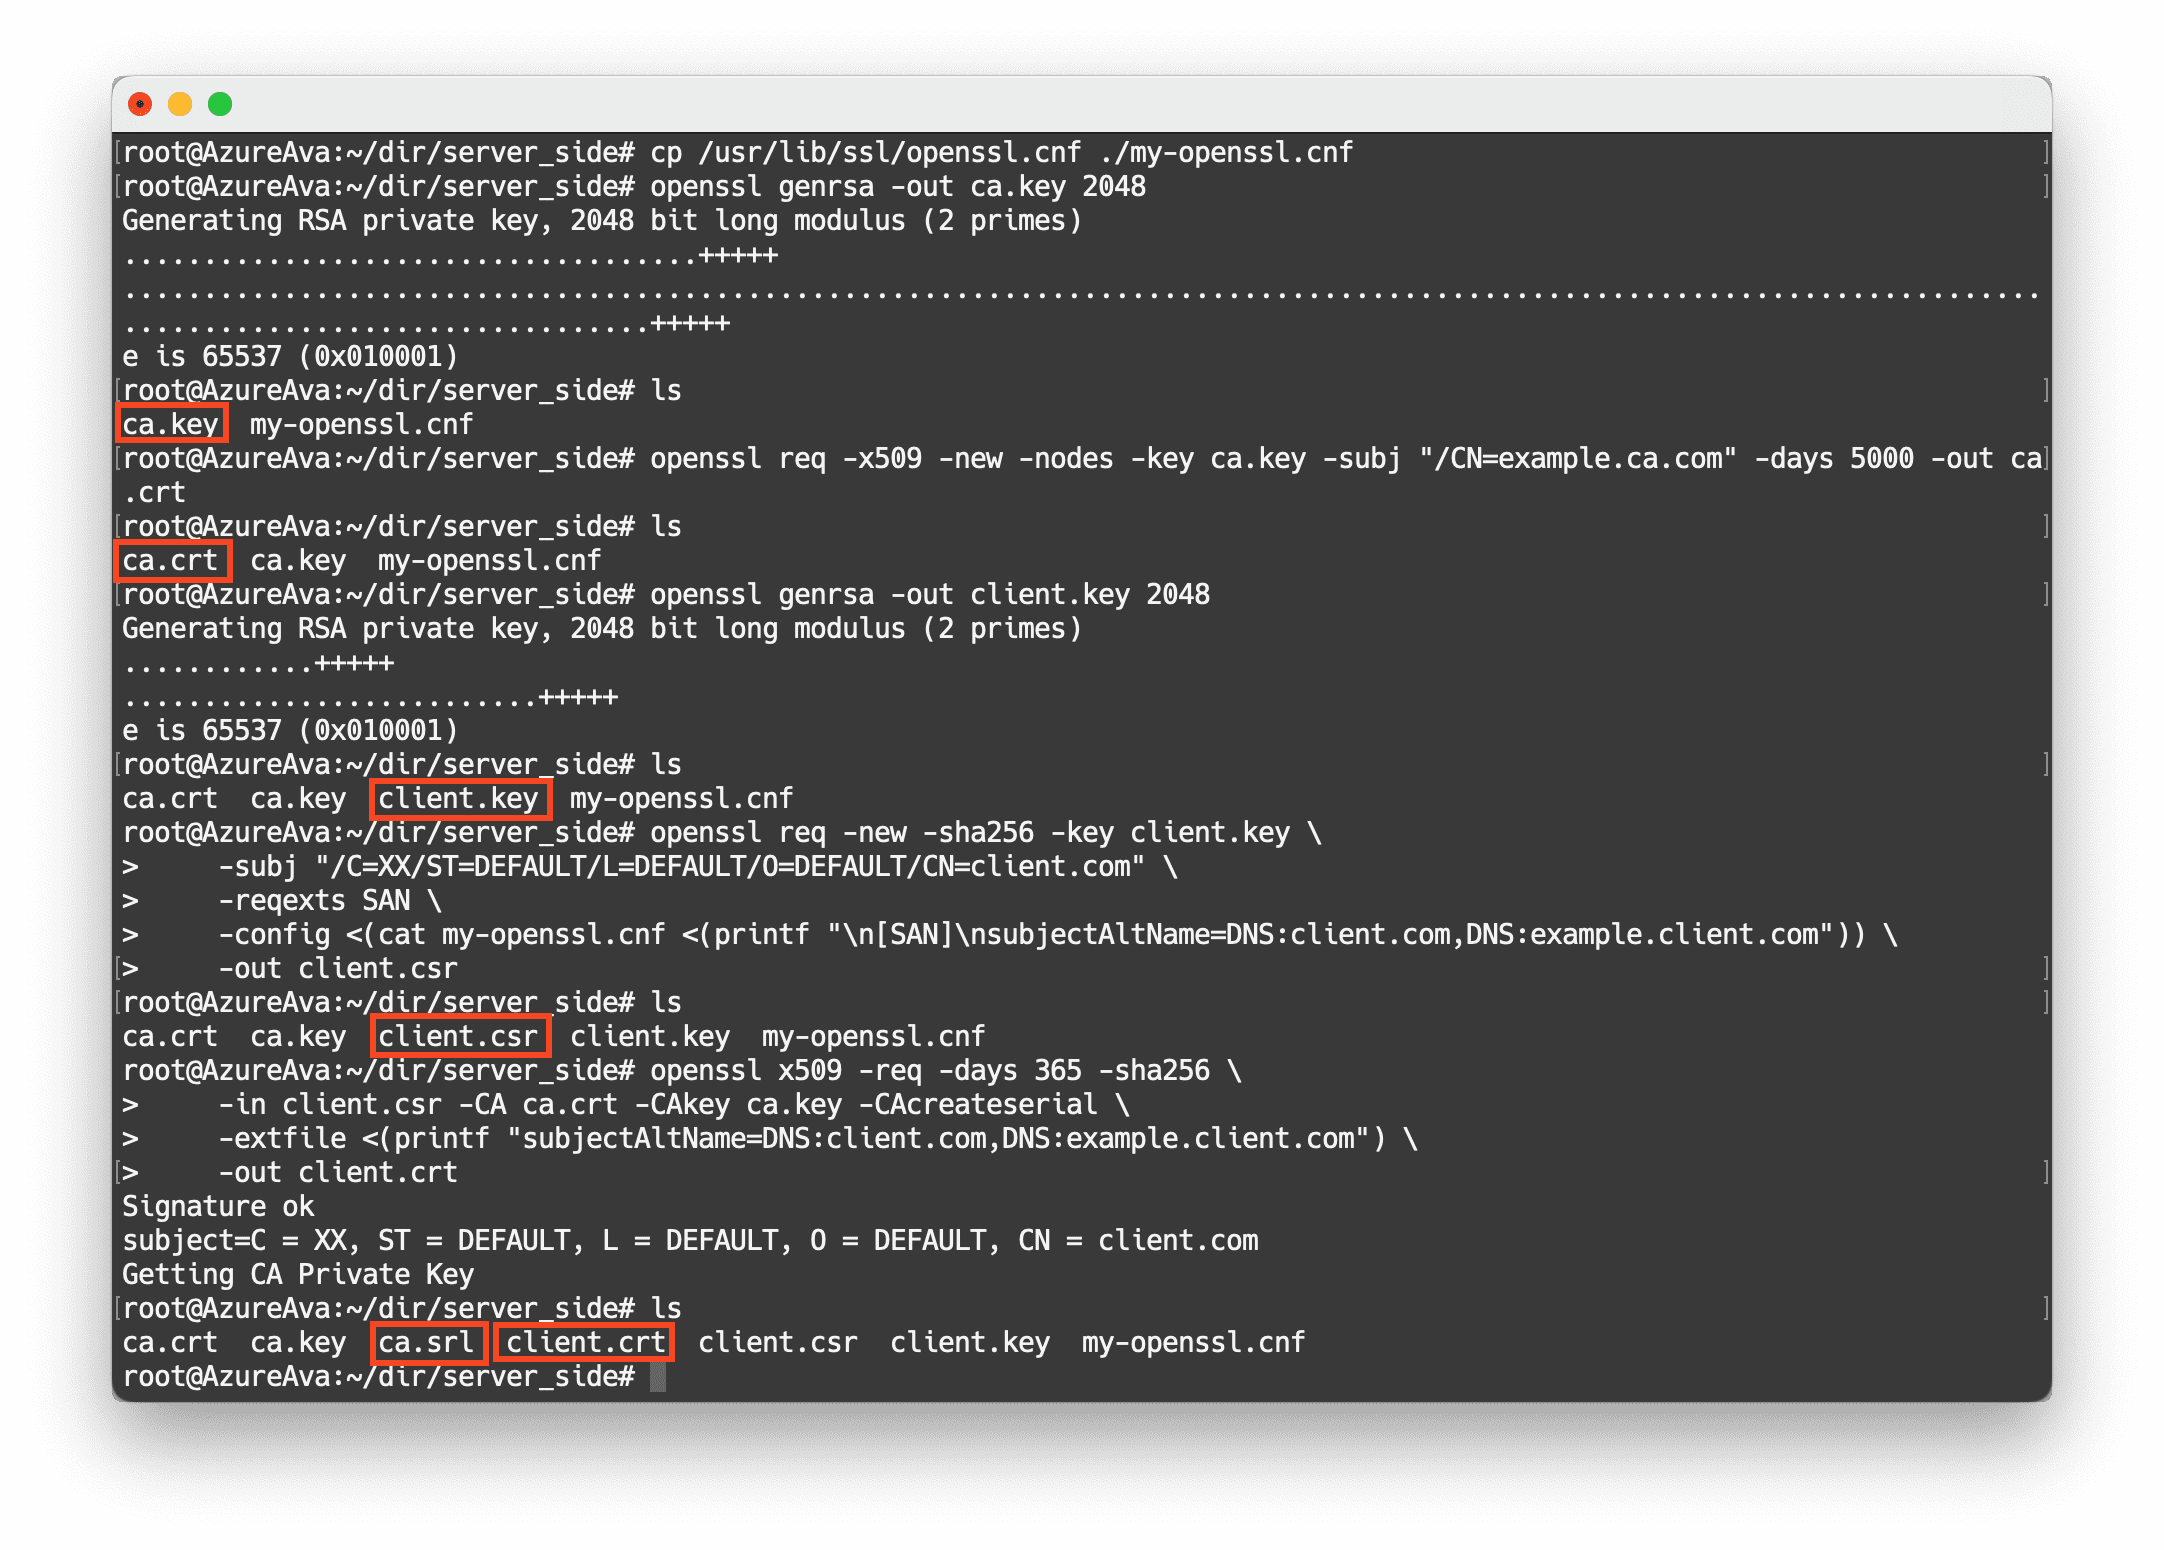
Then, copy client.key and client.crt to the client using scp or something else.
Edit configuration files
Configure following parameters under the [common] section to frpc.ini to enable TLS.
# enable tls
tls_enable = true
# specify the directory of client.* copied from server
tls_cert_file = path/client.crt
tls_key_file = path/client.key
# specify the directory of ca.crt
tls_trusted_ca_file = path/ca.crt
Configure following parameters under the [common] section to frps.ini to enable TLS.
# enforce tls to only accept TLS connections
tls_only = true
# enable tls
tls_enable = true
# specify the directory of server.* copied from client
tls_cert_file = path/server.crt
tls_key_file = path/server.key
# specify the directory of ca.crt
tls_trusted_ca_file = path/ca.crt
Finally, run ./frpc -c frpc.ini on client and ./frps -c frps.ini on server, to see if it works well. If everything is working properly, run them as system services using systemctl. The method for adding a daemon has been introduced in previous article.
In this way, communication between the client and server is encrypted with TLS.
Expose a local port to the server
After configuring the TLS encryption, you can use tcp mode to expose the local service to the server as follows, and all communication between frpc and frps are secured.
[rocketchat_tcp]
type = tcp
local_ip = 127.0.0.1
local_port = 3000
remote_port = 3000
Then, you can use nginx as reverse proxy to access this service through port 3000, like access a service deployed on the server.
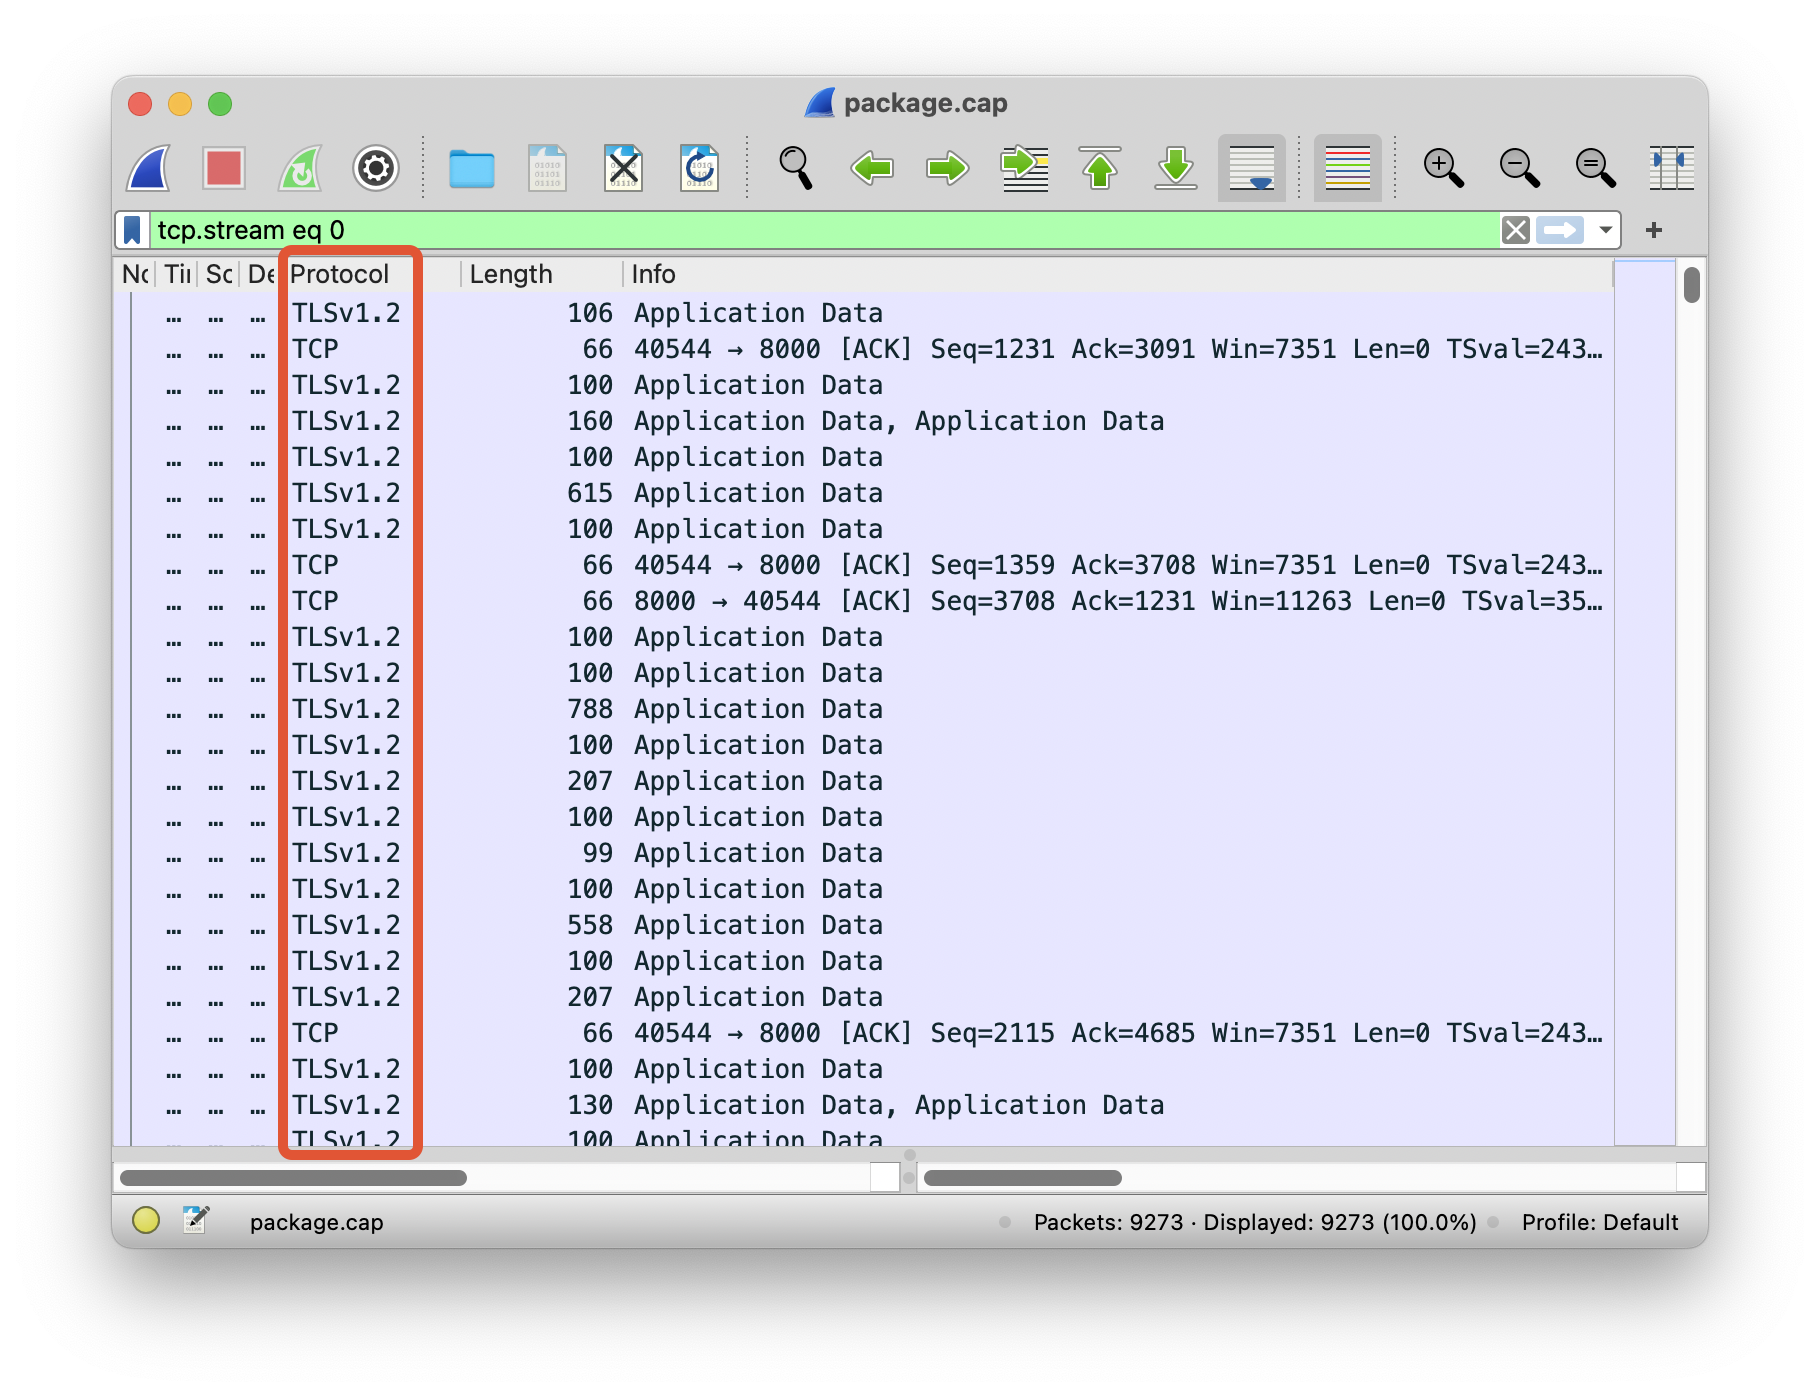
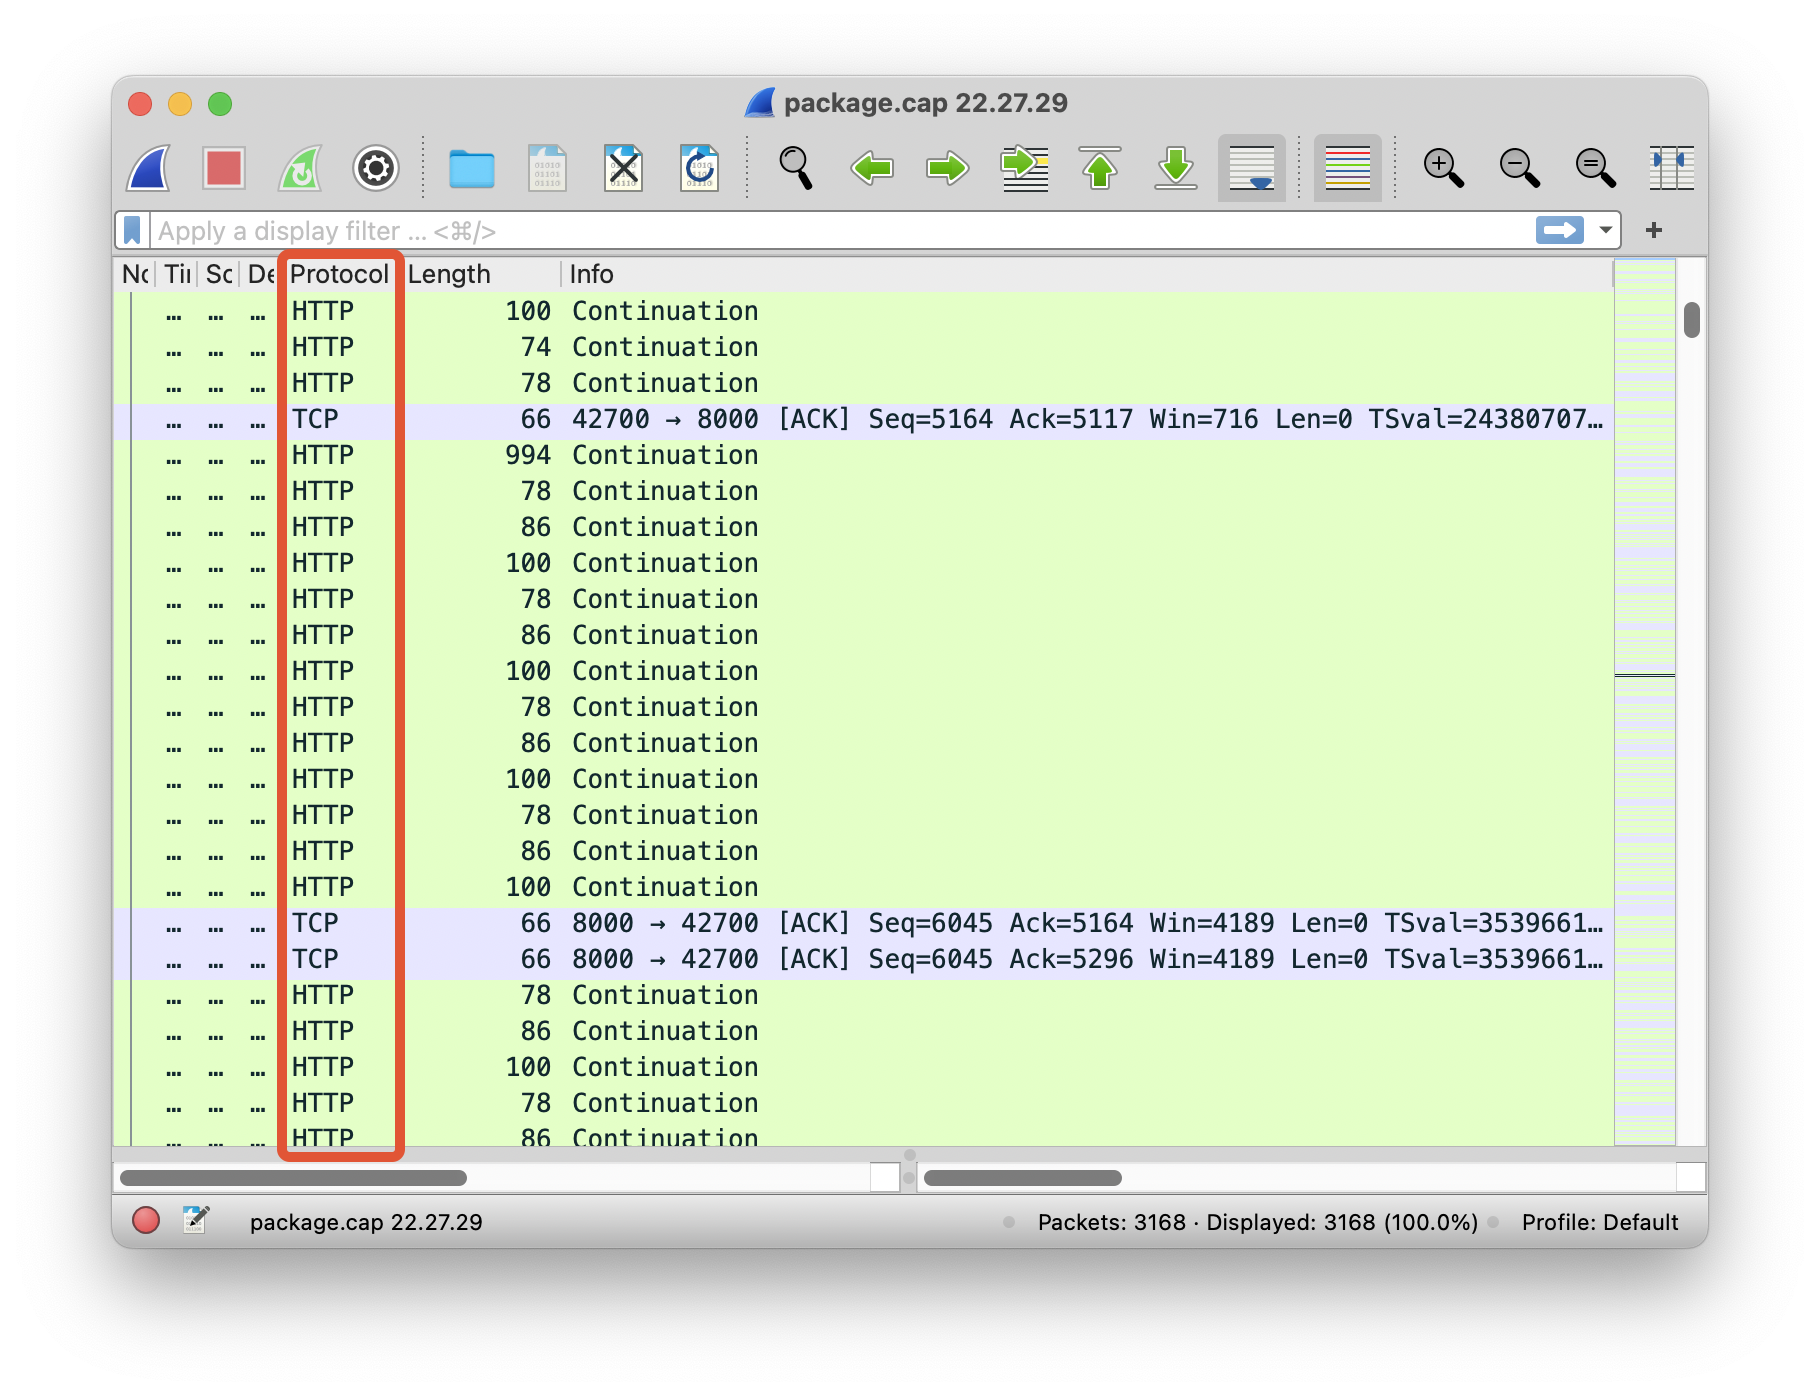
Capture packets to see the difference
Before:
After: